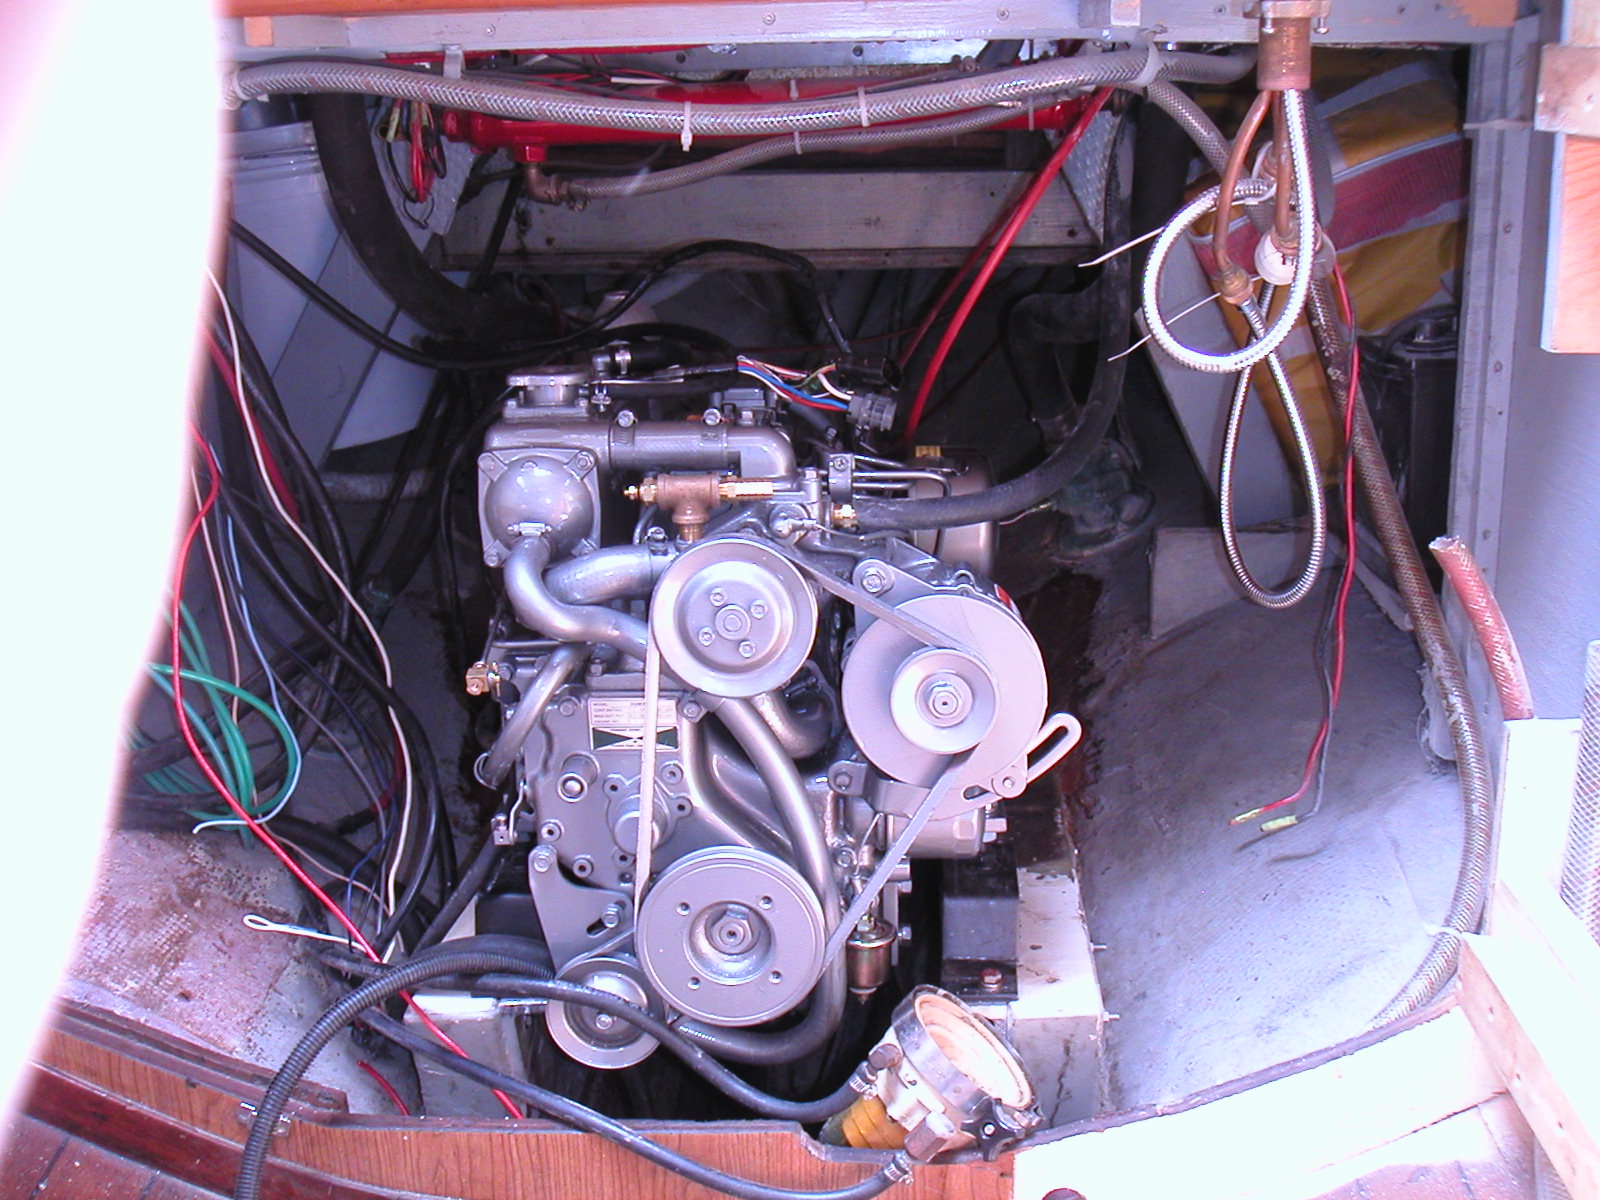
May 29, 1999
Panache (hull #60) replaced the Westerbeke 30 with a Yanmar 27hp 3GM
August 15, 2001
I may have to remove the Bukh diesel auxiliary as well. Can the engine come out through the existing doors, or do I have to remove the wooden partition to the left of the galley sink?
I have a Westerbeke 30 so cannot comment. It will be hell to remove that engine, but people have done it through the existing doors by stripping the engine.
Aug 15, 2001 8:47 pm
My boat also has the Westerbeke and I do appreciate Bert's wistful acceptance that the engine must be disassembled. Your Buhk is smaller than the Westerbeke by a considerable amount...
One day in Road Town Harbor the wind blew its typical 20 knots and we pulled a 17 foot motor launch alongside. Three Guyanese mechanics, whom had befriended me a year before, brought a small bag of tools and a 2X8 board about 30 inches long, aboard GiGi. Forty minutes later we manned the mainsheet tackle and swung the W-30 out of the boat and lowered into the heaving launch without removing anything except the alternator. No one was more amazed than myself who, like yourself, had stared at the location and the doors and the remaining opening many times. My greatest effort towards removing the engine was simply to sadly shake my head.
I have previously sent you the pictures regarding my major interior renovations that essentially were originally conceived with the sole idea in mind to provide real access to the engineering spaces. The results of some remarkable concept and the artistry of my friend and marine carpenter, Wayne Mantynan, have provided far more than I ever thought possible. Its not a walk around, stand-up space but at 6 foot 3 inches tall and 250 lbs I can reach everything in the space and perform just about everything needed.
Date:Tue Nov 6, 2001 9:05 am
Date: Tue Nov 6, 2001 9:36 am
The diagnosis of the alternate stroke banging noise certainly leads one to the theory that a connecting rod bearing could be the culprit. Each power stroke, being one of the four cycles, places huge and immediate pressure on the crank. The leak 'source' may offer further clues. Wrist pins, valve train failures generally won't create leaks. But I recommend that you do check the rockers and valve stems first. A broken pushrod or a snapped valve that has punctured a piston will certainly cause a large amount of very wet blow-by that can easily collect and leak from the top of the engine.
If you have not had the pleasure of removing the engine yet I offer my condolences on an interesting project. It certainly "looks" way tougher than it really is however. I did it on a mooring in Road Harbor with a two foot chop and twenty knots of wind.
In actuality, after disconnecting the shaft, the hardest job is done. The various spaghetti is no problem but I do recommend removing the manifold as well, it comes out as a unit after the exhaust hose is freed..
Place a substantial 2 X 10X about four and a half feet long, on-the-flat, and under the unit after removing the lag bolts holding the motor mounts to the stringers. Wedge a 2X6 twartships into the bilge just about even with the stringers (or lag into the stringers) to create a pivot point that prevents the unit from falling onto the engine compartment's bulkhead sill or the bilge once the forward mounts clear the stringer. I placed a 2X4 across the fwd. opening of the main cabin bulkhead as a secure point for pulling and ran the boom vang back to a loop of line on the crank pulley for the effort point. Put the mainsheet tackle on the boom just above and a foot or so forward of the engine bulkhead and support it at that point with the topping lift or a spare halyard to prevent bending the boom. Set the tackle more as a support than a lifting device. A cut piece of 1/2" plywood protects the cabin floor and you roll the unit to starboard a bit and "deliver" the unit with almost shameless ease. Later on the mainsheet tackle and boom can be used to remove the engine from the salon and ship it dockside.
Date: Tue Nov 6, 2001 9:48 am
The Westerbeke (unsure about your Buhk) will stand quite nicely on any three legs without much dimension shifting. Remove any motor mount bracket from the engine-side mounting and remove the lag bolts from the stringer, slip out the assembly and install the new mount to the old bracket, one at a time. Lifting that slight amount to "jiggle" it back into place is done with a pry bar. Used a tapered centering punch to align one bolt in the other hole and insert the first bolt the rest is 'cake'. Try to be sure to adjust the new motor mount alignment screw as close to the original length as possible to save yourself alot of time when re-aligning the engine.
Date: Tue Nov 6, 2001 1:41 pm
Thanks for the instructions. I'll be studying these with great intensity as plans develop. There's a lot of things I'd like to do to the engine with it out, like add a drain plug in the oil pan, etc.
Date: Tue Nov 6, 2001 11:01 am
I added a capped, flexible, neoprene, drain tube to make the oil changes easier. Simple plumbing and the drain bottle sits in the bilge. Easy to use a pump this way also.
Another thing I should have done is have a new dipstick and tube made to bring the pesky thing to a more accessible point. Easy thing for a welder to fabricate..... but I did find that the weld connecting the threaded fitting to the pan had begun to leak. Hard to reach with the engine in place.
Consider revitalizing the manifold and heat exchanger by a thorough cleaning, glass beading and powder coating. I was amazed at just how much pitting had occurred in the aluminum... new the manifold is over $3,000 from Westerbeke and the exchanger seems unavailable. Barr will build one for you but the price, once again, is staggering.
The process should be considered for the transmission, motor mount brackets, engine drive pulleys, valve cover. side covers, oil pan, starter case and timing cover as the salt corrosion will become evident immediately if the engine has lived in hell for so many years. The price should be about $300.00 total. If you are tearing the block down to the bare unit I would have it powder coated also. In all cases of powder coating, be sure to completely protect any threaded holes from the coating. It is almost impossible to rethread any fitting through this tough shell. I had to tap most of those that I did not adequately protect. Be sure to leave the block un-coated at the point you battery ground cable contacts the block surface. The coating is a natural dielectric insulator.
Be sure to drill a few sample bores into the stringers. They do tend to rot under the fiberglass. In most cases the injection of epoxy after cleaning out the punky rot does the trick.
Date: Tue Nov 6, 2001 1:14 pm
As an alternative to new engine parts - there is a dealer here in Seattle that has many old Westerbekes on hand. We used him instead of Hanson Marine in Marblehead for some large replacement parts. While not dirt cheap, the parts were about 1/3 of the new cost. He reconditions as required and is knowledgeable about the W 27 in our boats. You may want to call him to see if he can offer replacement parts for your projects. It's:
Stewart Marine Engine
4600 Shilshoe Blvd
Seattle WA 98107
Date: Tue Nov 6, 2001 1:29 pm
Could you give a few details on your "simple plumbing" arrangement for an oil change drain tube and bottle (type and capacity too: not much access under the pan). Thanks for all your sharing of well thought out experience. Hope I can sail the next 3 days...
Date:Tue Nov 6, 2001 10:02 pm
Date: Wed Nov 7, 2001 6:26 am
Could you give the dimensions of your staysail, and cloth weight, type?
Thanks for another worthy addition to Doyle and UKSailmakers as source (besides
www.sailsource)Date:Wed Nov 7, 2001 10:14 am
Date: Wed Nov 7, 2001 10:00 am
You may actually be referring to a letter I sent to Seawords possibly ten years ago. As a new owner I was virtually daunted by the unusually tight engine quarters. I may have asked how to do it without a saw, more likely in jest. Now, having removed and re-installed the Westerbeke, now, twice the project is a bit more routine, not easy, but not as daunting as it appears.
Even now that I have made the extensive modifications to fabricate a fully removable sink locker, that provide almost double the forward access to "Thumper", the project of lifting it from her home basically follows Don's list.
I would point out however, one slight error in Don's very easy, precise and accurate instruction list (sorry Don) . The 'end' of the boom is several feet aft of the companionway and a direct, vertical lift from the cabin sole is not possible. I must presume that he first vertically lifted from the cabin to the bridge deck from a point just above the companionway sill, re-positioned the tackle and then out of the boat. This method prevents damaging any woodwork and still requires no saw at all. I will point out that he improves my own method considerably by his "Item # 2". The 2X8's on the sole continues the sliding out process with more consideration to the lower opening of the bulkhead, where you will sustain damage if not careful. I suspect an improvement of the idea would be to 'tack' about three 1X2's below the vertical 2X8's to keep them vertical and spaced to best utility.
In any case, I do suggest that the job requires two healthy but smaller stature mates below to pull forward and maneuver, the third positioned on the bridge deck to handle the lifting tackle.
Oh! By the way. Bring lots of Go-Jo, clean rags and a bucket of cold water laced with Woolite to soak the mainsheet and vang tackle in. They will shed the greasy residue overnight.
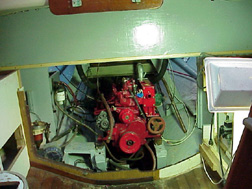
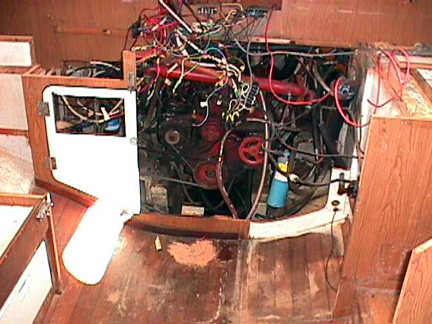
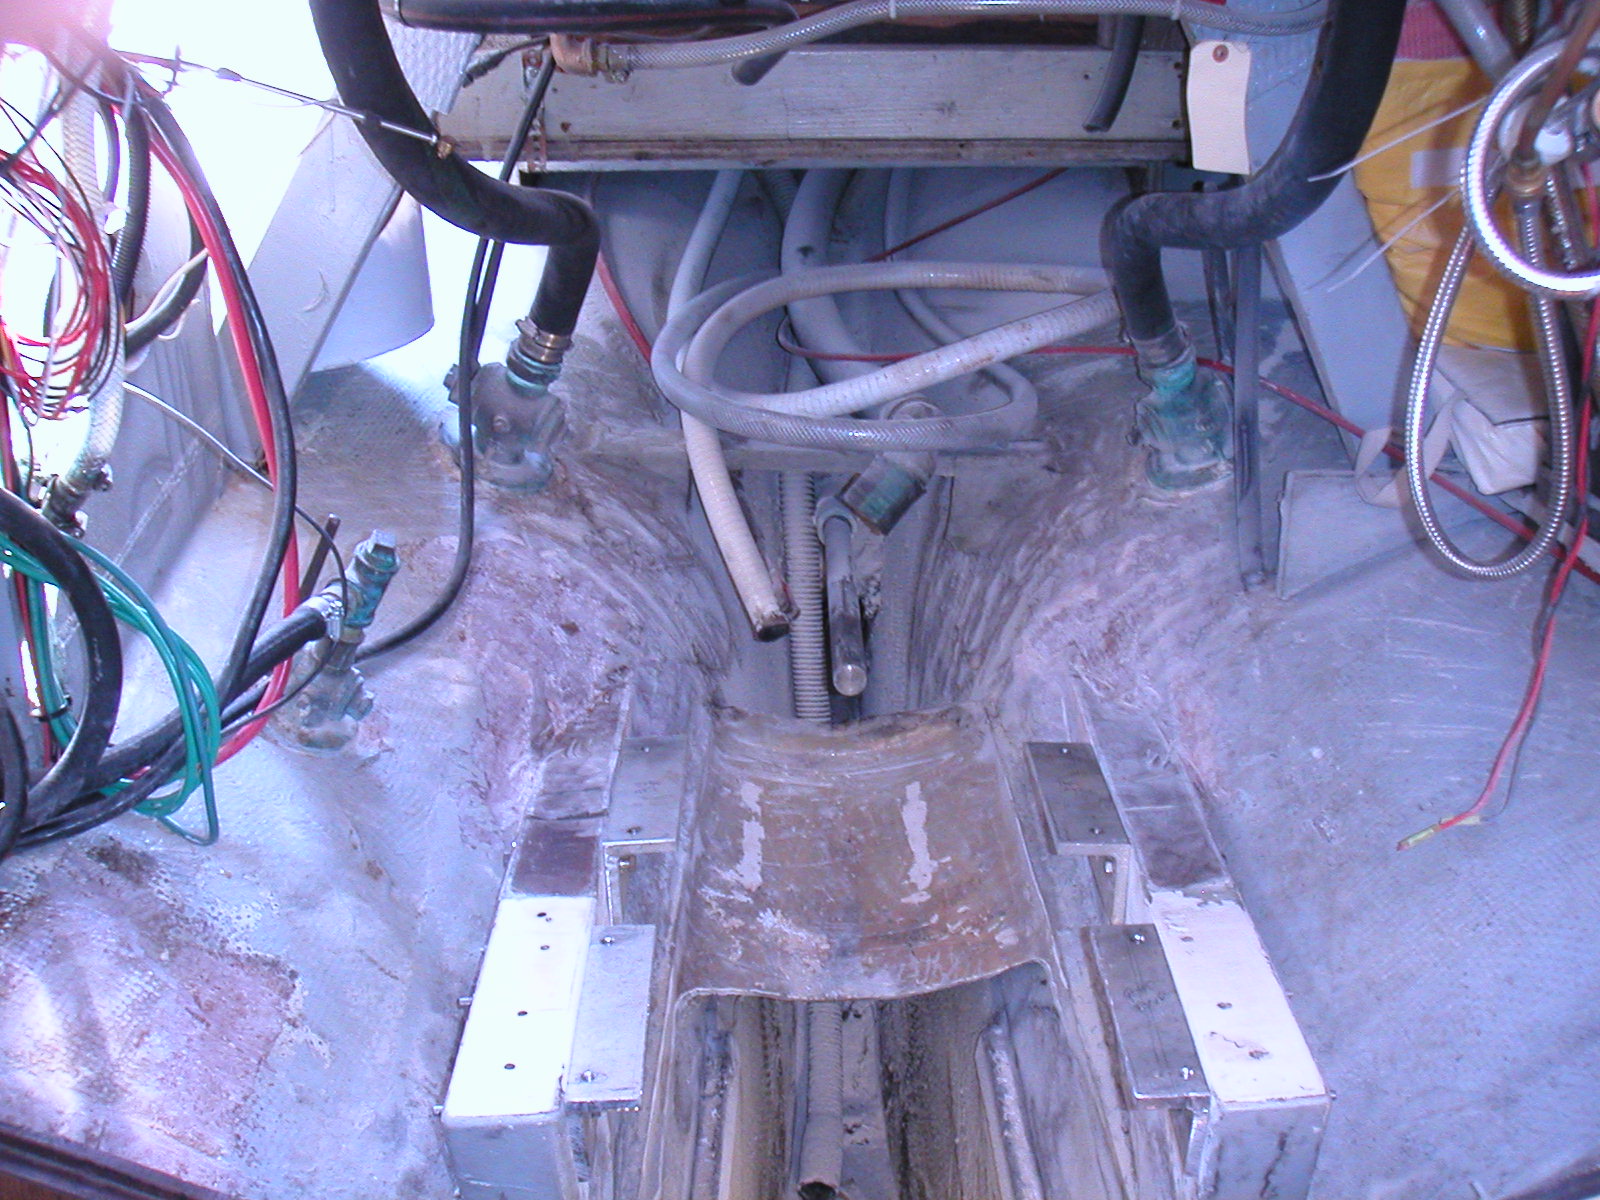
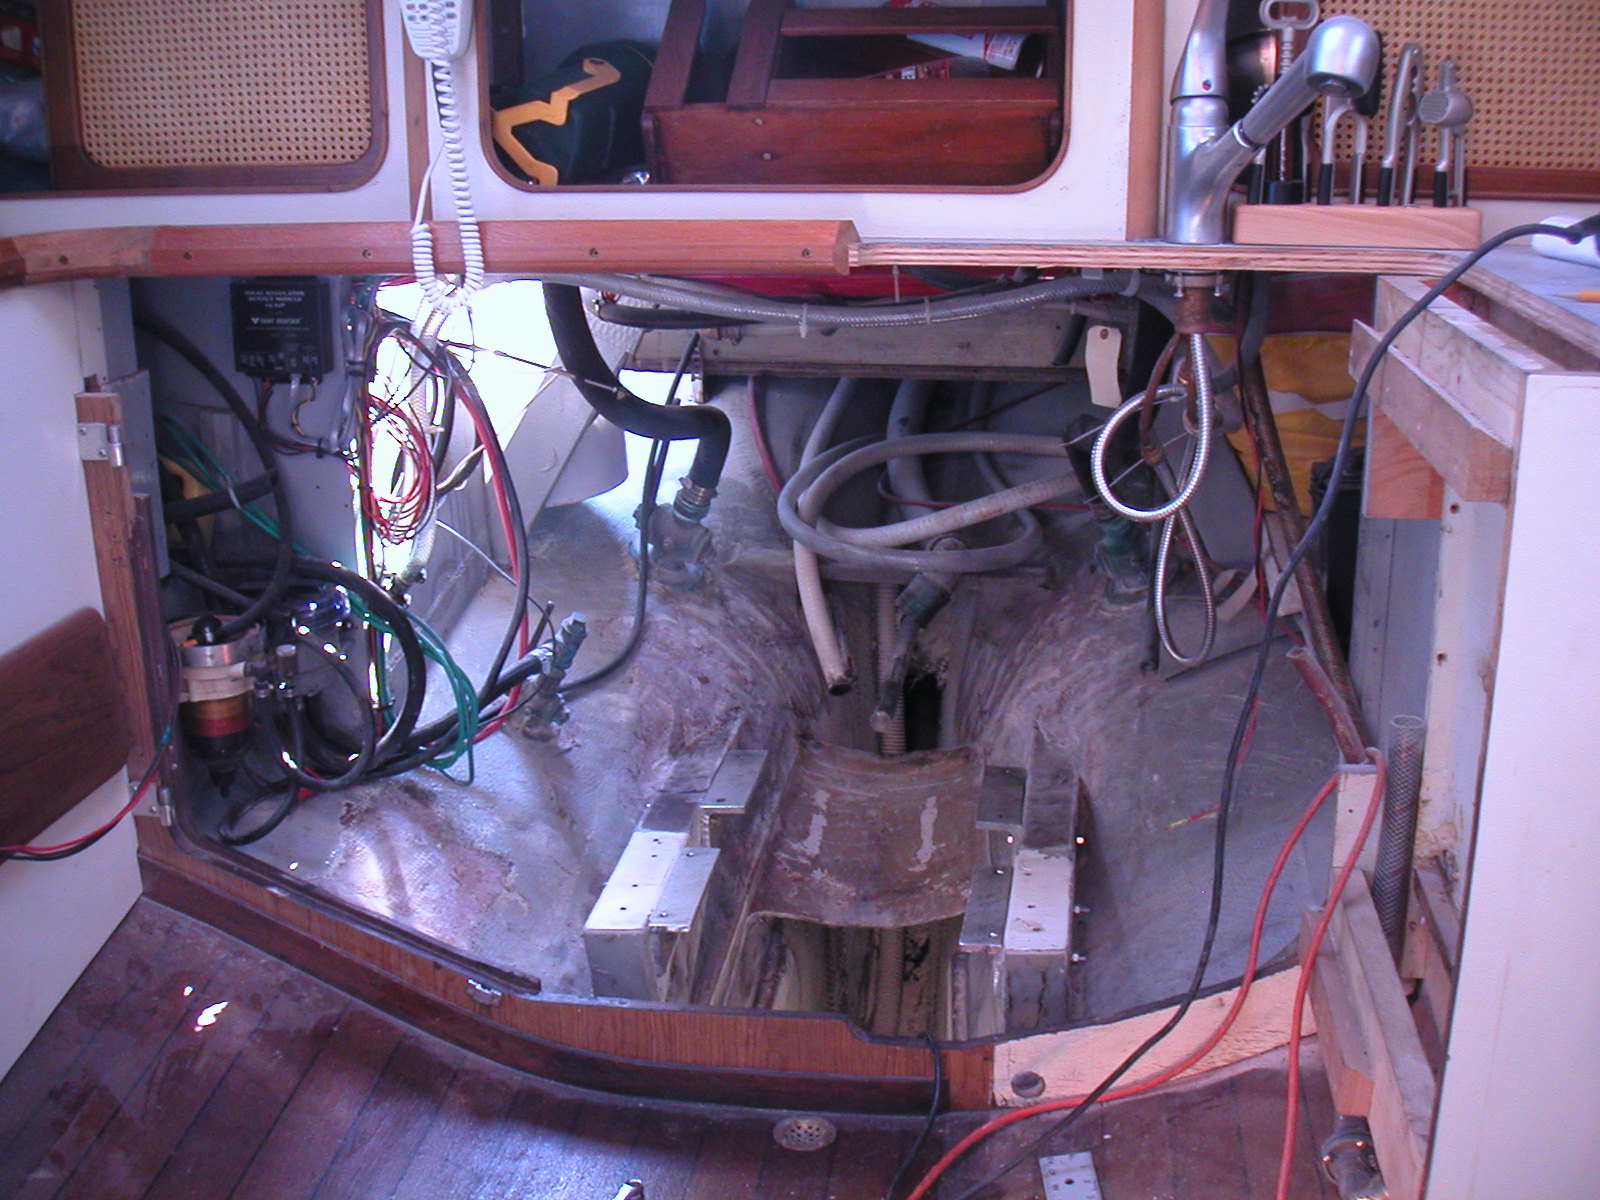
New Engine Access
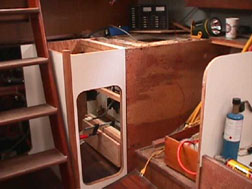
Gigi Sinklocker Modification
Date:Wed Nov 7, 2001 9:26 am
Date: Wed Nov 7, 2001 10:53 am
If memory serves me correctly, the Pathfinder is the marinized version of the VW diesel. The overhead cam on that engine seemed to increase the vertical height a bit. Please correct me if I am wrong... but I do envy the 55 horses! There have been times that I think I have prayed for just a few more ponies.
The original doors for my engine access were fairly symmetrical and did contain two small, removable drawers. In the new arrangement I have opted to do away with these and have fitted two larger/longer drawers to the new navigation locker. These face fore & aft and slide from the forward side of the nav locker and just above the settee. A third, wider unit now faces inboard from a lower aspect and replaces the original locker door below the navigation surface.
Date:Wed Nov 7, 2001 11:04 am
Nov 11, 2001
We removed NIRVANA's Westerbeke and replaced it with a Yamaha in 1991. The removal was done at the dock in the yard of the Yamaha dealer. He used a forklift to remove the engine.
We did all of the prep work that others have so fully described. With one addition. I put towels on the cabin sole on top of the piece of plywood. I was glad I did. The forklift operator "lifted" a little early and the dipstick holder caught on the companionway and broke off. The towels caught most of the oil.
I was also interested to read about dipstick location. At our first "still within warranty" checkup of the engine in 1978 the mechanic "strongly" suggested moving the dipstick to a more forward and more accessible position. As others have written, this was an easy renovation and saved Tim many frustrating hours during the 18 years we owned NIRVANA.